 Nico Brailovsky's thought repository
Posts for 2025 March
Homeboard: Versioning frames
Post by Nico Brailovsky @ 2025-03-23 | Permalink | Leave a comment
Since I've been fixing plenty of bugs, figured I should also start versioning my frame mount designs.
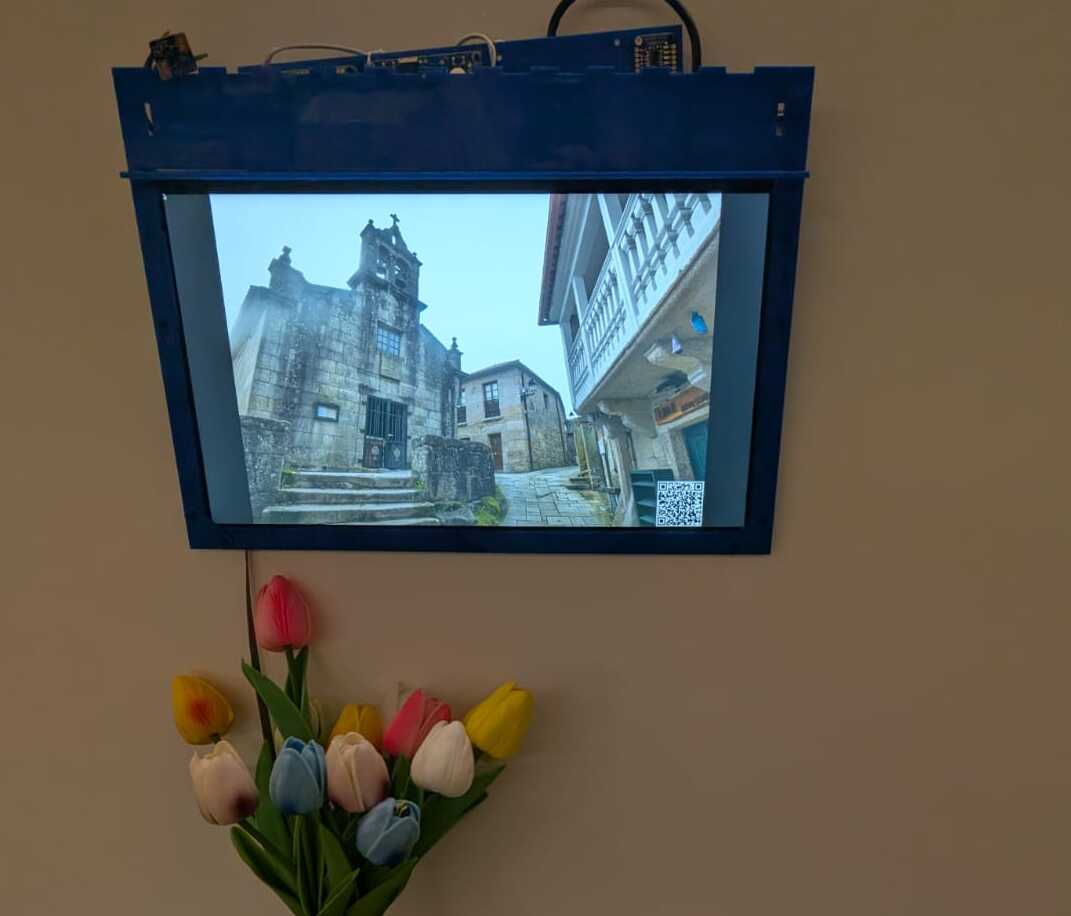
The Ikea-frame version should look something like this:
The design for this one lives here

You can download it an open it with Inkscape; remember to switch to outline mode in Inkscape, otherwise you're unlikely to see anything. The frames are designed for a laser engraver, and the cuts are about 1/100'th of a mm.
And the standalone vesion will hopefully look a bit less terrible than this, since this picture is from a few bug-revisions before:
The design for the standalone version:

Homeboard: A Hardware bug!
Post by Nico Brailovsky @ 2025-03-16 | Permalink | Leave a comment
I found my first hardware bug! Can you spot it? It's the big red circle:
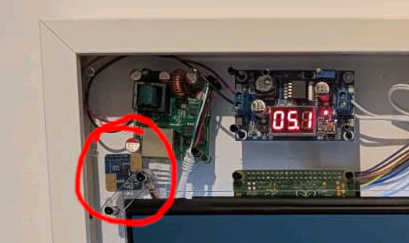
The mmwave sensor was mounted too close to either the screen, or the power source (something I thought was a brilliant idea yesterday). Turns out that mounting it so close has an affect on this sensor: when the display is on, it blocks the sensor (and reads it as no-presence). When the display is off, for some reason the sensor picks it up as someone being present. This is bad, because on presence I turn the display on, and on vacancy off. I guess my living room put on a light show for my cats last night.
I suspect I could fix this in the firmware of the sensor, but that's pointless because I can't reverse engineer the sensor protocol anyway. What's the next best fix?
I moved the sensor out of the way, while I think of a better placement.
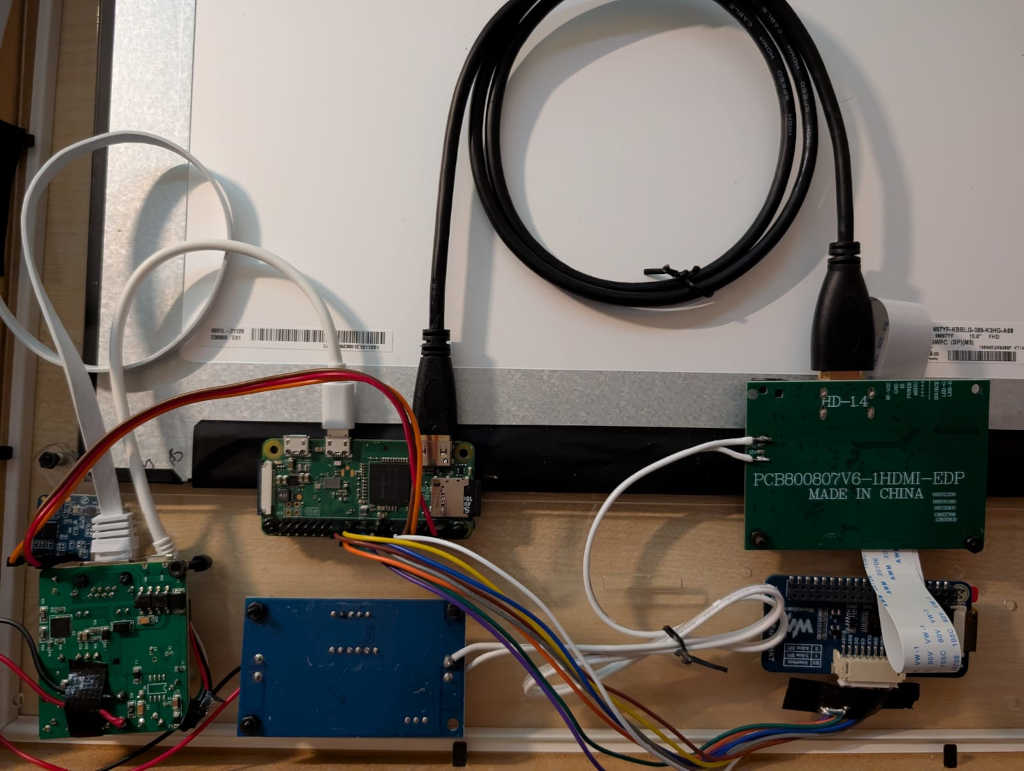
Homeboard: eInk display
Post by Nico Brailovsky @ 2025-03-15 | Permalink | Leave a comment
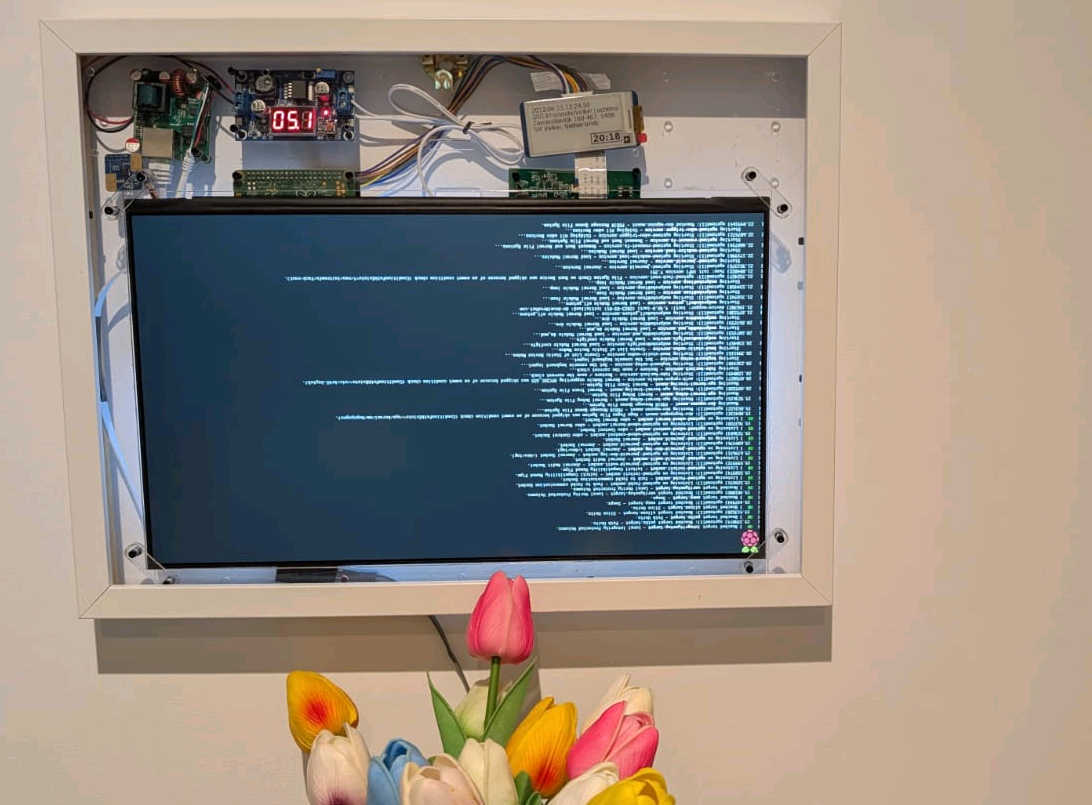
Homeboard gained a new form factor: slightly less crappy frame.
I now keep two Homeboards, one in my office -mostly for hacking- and one to display pictures. The one in my office didn't have a good space for the eInk display (spoiler alert: it still doesn't) making it awkward to see both the "real" display and the eink one. To fix this, I built a new mount based on a picture frame. This time all of the elements are mounted directly on the front frame (spoiler alert: this was a huge mistake), and I used transparent perspex material to cut it, so that all elements are visible (I do like this bit, the boards that make up Homeboard are quite pretty).
Mechanics
The build uses an Ikea picture frame, but replaces the front plate with my laser-cut front.
- The Ikea frame is great for this, it's built to support a front plate of 3-6mm, fitting a perspex sheet ferpectly.
- I'm happy with the display corner clips, too. You can see in the picture they hold the display, but are not too obtrusive (only partly due to the clips being transparent). Additionally, they are great to clip on small boards with no mount holes, like the radar sensor (top left in the picture).
- The ribbon connection to the display is hell. The position is awkward, and I can't fit it with a short (2cm) cable. I used a long one (15cm) but it looks untidy.
- Don't overtighten display screws! It's easy to put too much pressure and damage either the two perspex sheets, or the sandwiched display in the middle. I found for a 3mm perspex sheet with a laptop display, 10mm m2 screws loosely tightened (?) work best.
- If you use my mechanical drawings, be careful: between ID V1 and this one, there was bitrot in my svg, and the screws in the pi don't align anymore. Also, the display hole isi about 2mm too big for my panel, and I don't know why (my last cut it was 2mm to small!)
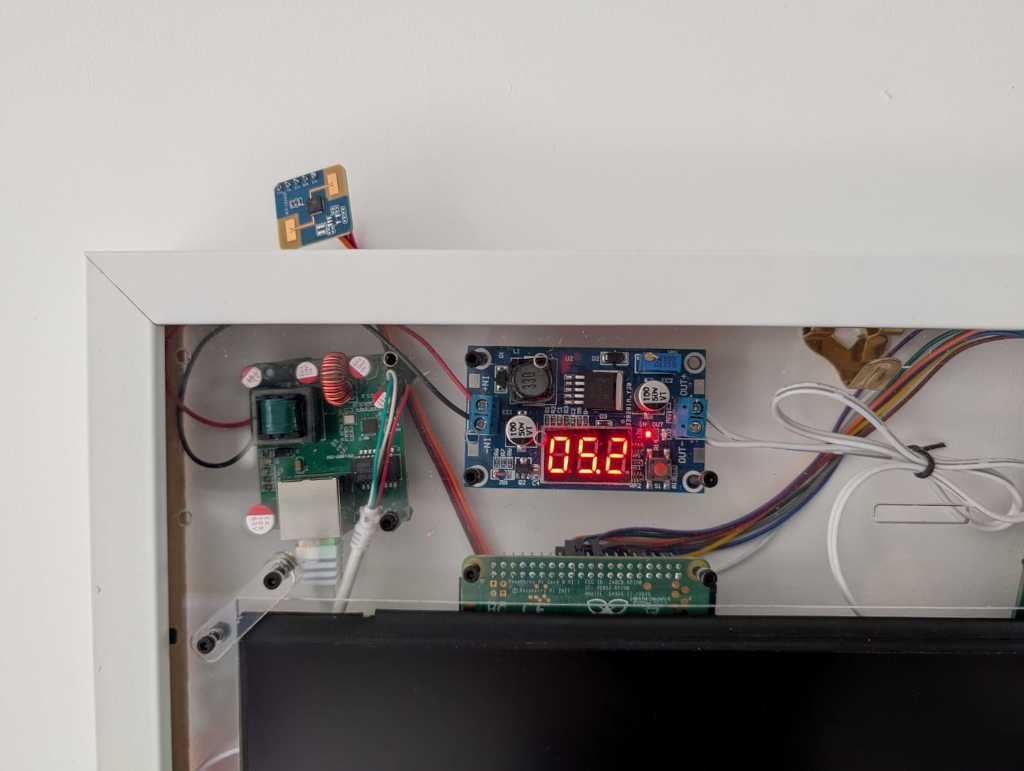
The back of the frame:
Some things I need to improve:
- Ribbon, long or short, placing is super hard. For V2 of this ID, I need to think of a better placement
- In fact, mounting everything to the front panel was a big mistake. It means that mounting things is awkward, because I need to work with a big panel. Any wiring mistake means I need to unmount the board, fix, test, remount. It's much much MUCH easier if I mount all the boards to a single main perspex board, then mount that to the main frame.
- Having a main board with alternative mount position should make it easier to make mounting the ribbon cable less terrible. I need to move the edp board 20mm to the right in this ID, but it's much easier if I don't need to carefully align this before I cut it.
- The corner clips are awesome! I can even use to hold sensors without a screw hole. Here I mounted the mmwave sensor (with no mount screw holes) using one of the corner clips.
- This doesn't work for the eInk display, unfortunately. I still need to figure out how to mount the eInk display without using tape.