Posts for 2024 July
Homeboard P0: Stonebaked Margherita Picture frame
Post by Nico Brailovsky @ 2024-07-18 | Permalink | Leave a comment
With my homeboard booting up, it's time to make it show something. Some day I'll build a net-boot capable system, but until then I'd like to have it do something, even if it's by installing a few services by hand.
SD bootstrap
[Feb 25 edit: added this section]
An Rpi Zero won't do much without one, so, starting with a base Raspbian Bookworm for Rpi Zero (32 bit), with no GUI:
- Download an ISO compatible with the board
sudo dd of=/dev/sdX if=./XXXX.img bs=8M status=progress- Mount sd card, then
- Enable ssh:
cd /media/$USER/bootfs && touch ssh && touch ssh.txt - Create user (headless):
echo username:password > /media/$USER/bootfs/userconf.txt
These steps will give you an sd card that should boot and automatically connect to an eth connection (not wifi, of course), and let you ssh into the device to continue the setup. No need to hook up a keyboard.
First boot
Optional: UART is useful to debug the first boot, but if the SD bootstrap was successful everything should just work.
- Debug why the system doesn't boot, as with any new install
- UART into the system, then enable SSH (because the USB ports are hard to reach to connect a keyboard)
- Disconnect UART, reconnect sensors, login over SSH
- apt-get update, upgrade, etc...
Prepare Wayland
Raspbian Bookworm 32bit doesn't have support for Wayland out of the box. To enable:
- Add this magic to /boot/firmware/config.txt
dtoverlay=vc4-kms-v3d
gpu_mem=128
- /boot/firmware/cmdline.txt needs to have
wayland=on sudo apt-get install mesa-utils-bin wayfire seatd- seatd is required to manage sessions, otherwise wayfire will complain it can't open a terminal.sudo usermod -aG tty username- I'm not sure if this is required. Try to skip it and see what happens. Let me know if you do.- reboot
- After booting up, it should be possible to run
wayfirein a terminal; an empty Wayland screen (with a cursor) should show up
Wayfire as a service
With everything "working", we can make Wayfire a system service, so it will start at boot:
Add this to /etc/systemd/system/wayfire.service (change the user name, and you may want to change the runtime dir too):
[Unit]
Description=wayfire
After=multi-user.target
[Service]
Environment=XDG_RUNTIME_DIR=/run/user/1000
ExecStart=wayfire
StandardOutput=inherit
StandardError=inherit
Restart=always
RestartSec=10s
User=batman
[Install]
WantedBy=multi-user.target
Now enable the service
sudo systemctl daemon-reloadsudo systemctl enable wayfire
Use this on your next reboot to find out why things are broken: journalctl --follow --unit wayfire
Note: wayfire seems to crash a few times on startup. I guess there is a service dependency I haven't found yet, but as long as it's set to Restart=Always it should eventually come up.
Screen rotation
Because of the way the flex cable is fed to the HDMI-to-eDP board, the screen may end up rotated 180 degrees. You may also want a portrait picture frame, instead of a landscape one. To rotate Wayland:
- Do
kmsprintorkmsprint -m - Look for the name of the screen, eg HDMI-A-1
- Look for the mode, eg 1920x1080@60.00
- Create this in ~/.config/wayfire.ini, replacing the values found above for your setup
[output:HDMI-A-1]
mode = 1920X1080@60.00
position = 0,0
transform = 90
~~No need to reboot Wayfire, it should pick up the changes and fix itself immediately. I think.~~ You'll need to sudo systemctl restart wayfire to see the changes.
swayimg
With a GUI, it's time to show a picture. I hacked swayimg to load pictures from a local server, plus a few other useful features to make it more usable in a RpiW, like consuming less memory than default, and porting to 32 bits. To install dependencies:
sudo apt-get install libcurl git ninja-build meson
sudo apt-get install libcurl4-openssl-dev
sudo apt-get install libwayland-dev wayland-protocols
sudo apt-get install libjson-c-dev libxkbcommon-dev libfontconfig-dev libjpeg-dev
To build: [Yes, this is building swayimg in our target. This is horrible and will take a long time, so be prepared for a long coffee break. Some day I'll setup a crosscompiler].
git clone https://github.com/nicolasbrailo/swayimg.git
meson setup [build|--wipe build]
ninja -C build
Make sure the meson step finds curl and libjpeg, otherwise it won't be a very useful LAN picture frame.
To start:
- Launch Wayfire in a terminal
- In another terminal:
WAYLAND_DISPLAY="wayland-1" DISPLAY="" /home/batman/swayimg/build/swayimg
Check that nothing crashes too much.
P0 picture frame
Also this to /etc/systemd/system/ambience.service (also change the user name. Or make a new user):
[Unit]
Description=ambience
After=multi-user.target
[Service]
Environment=XDG_RUNTIME_DIR=/run/user/1000 WAYLAND_DISPLAY="wayland-1" DISPLAY=""
ExecStart=/home/batman/swayimg/build/swayimg
StandardOutput=inherit
StandardError=inherit
Restart=always
RestartSec=3s
User=batman
[Install]
WantedBy=multi-user.target
Then:
sudo systemctl daemon-reload- In a terminal:
journalctl --follow --unit wayfire --unit ambience - In another terminal:
sudo systemctl enable ambience
sudo systemctl restart ambience
Next time you boot up, the Stonebaked Margherita P0 frame should behave like a picture frame.
Homeboard P0: Stonebaked Margherita
Post by Nico Brailovsky @ 2024-07-14 | Permalink | Leave a comment
Homeboard P0 has been built!!1
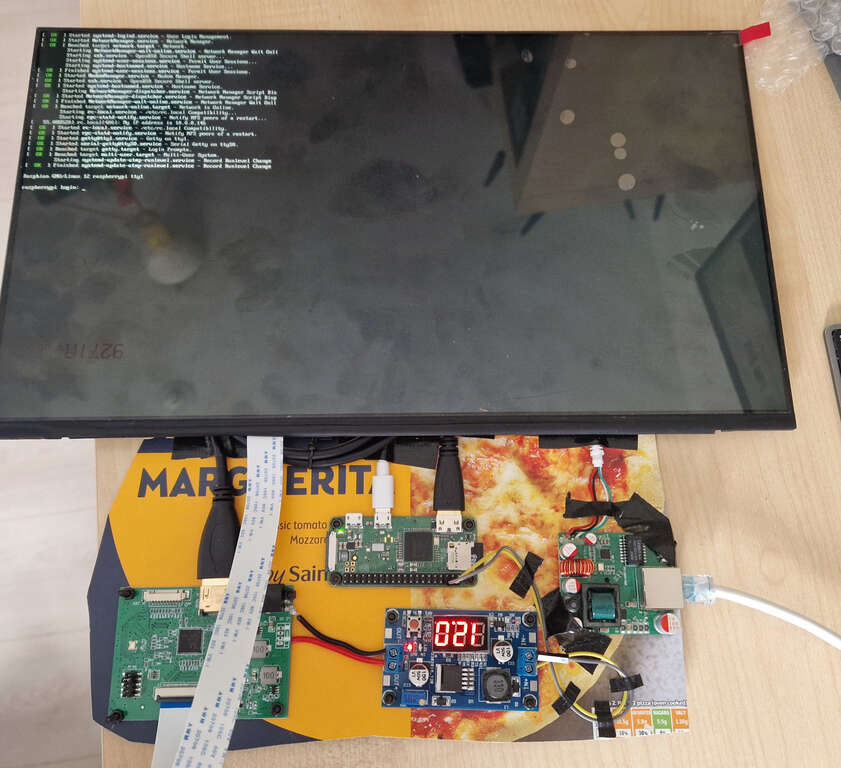
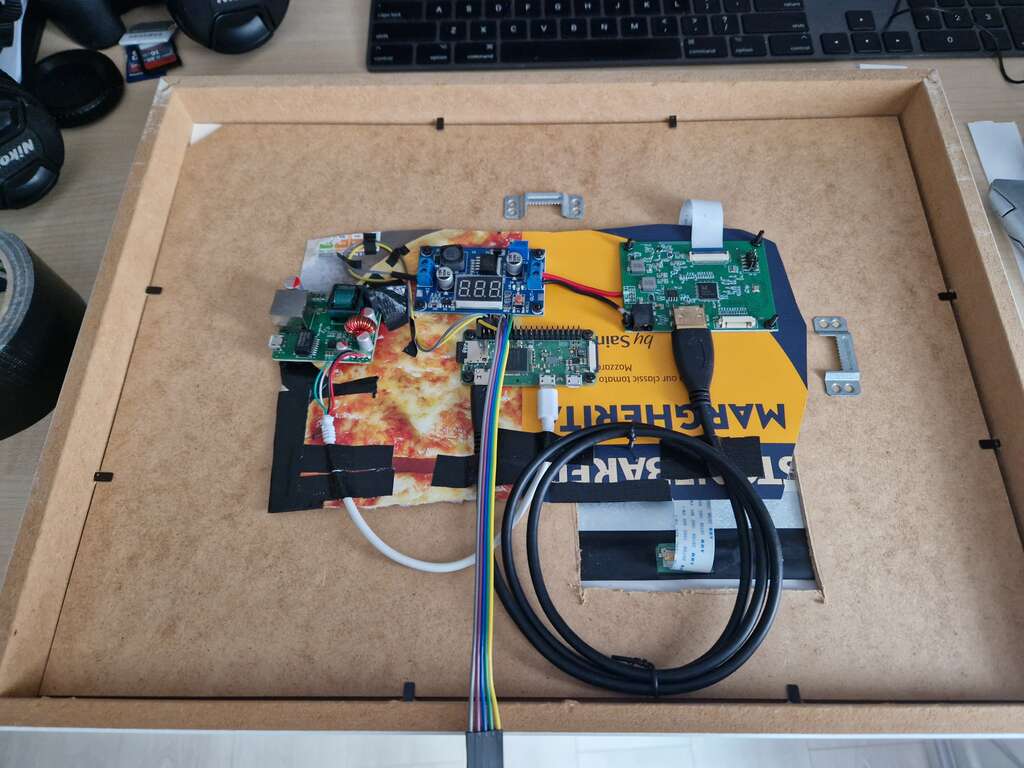
After figuring out how to run my own LCD panel, it was just a question of buying the right cables. I wanted to build a homeboard, and I thought I'd spend a ton of time writing cool software. Turns out 90% of the project is a game of "did I buy the right cable". Eventually I did end up with enough cables to build this monstrosity:
You are admiring a:
- Raspberry Pi zero,
- Powered over ethernet, with a PoE adapter
- The Raspberry Pi Zero powers the LCD controller board
- But the controller board needs 12V, so there is a DC-DC board that bumps the 5V from the RaspberryPi to the 12V the board needs.
(Full list of materials further down, so you don't need to hunt all of these)
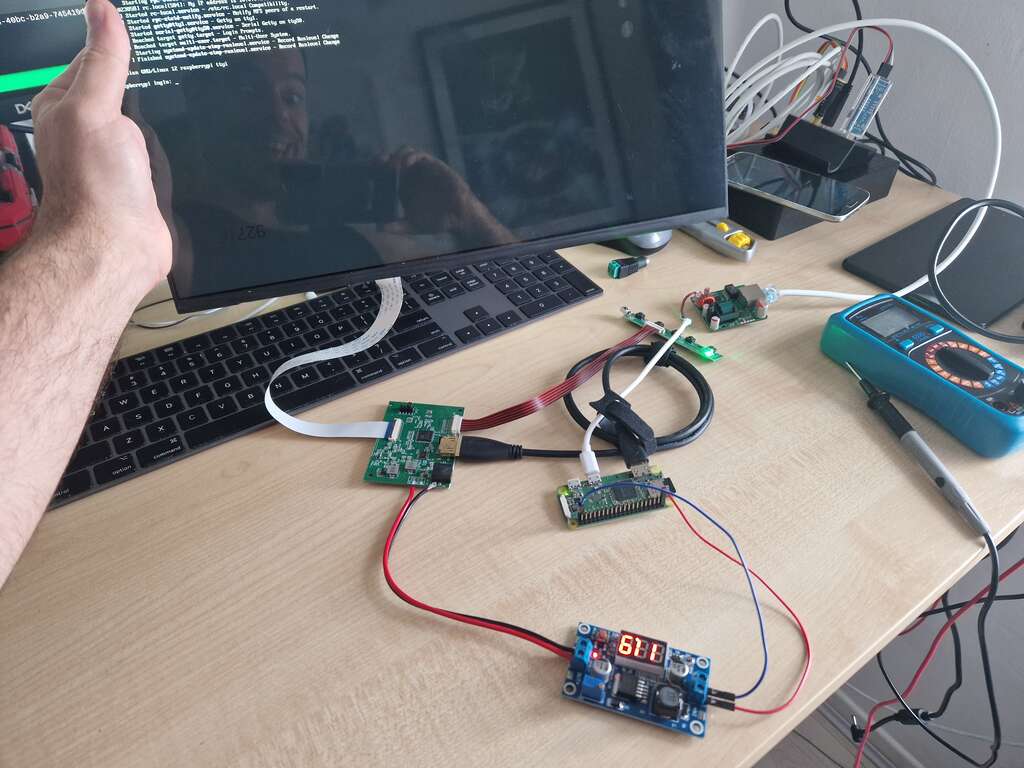
Here the glorious moment everything is connected together, and actually boots an OS:
Of course at this point I realized the weak point of my design is on the mechanical linkage between the different boards. To tame this quite literally unwieldy hodgepodge of cables, I ate a pizza:
Using the cardboard box of a pizza, some ducktape and a few M2 screws, I built a beautiful hack mount for all my boards, which let me move the assembly around for tests. This was enough for quick power checks, but pizza box cardboard isn't a very durable material. I upgraded to a full frame:
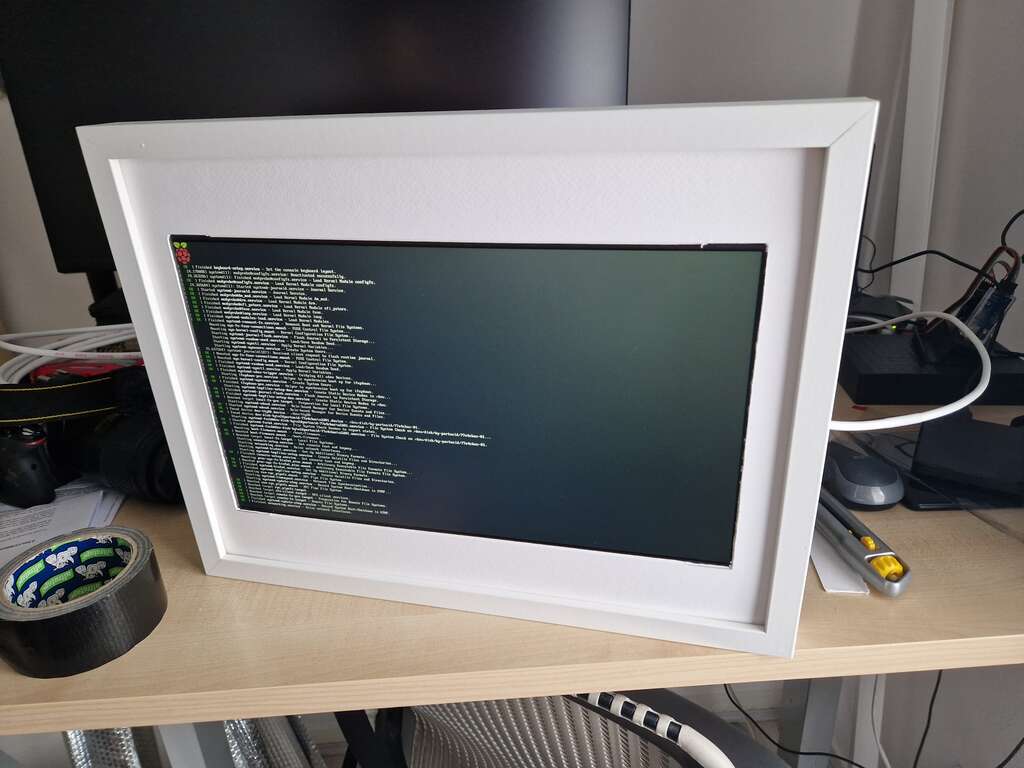
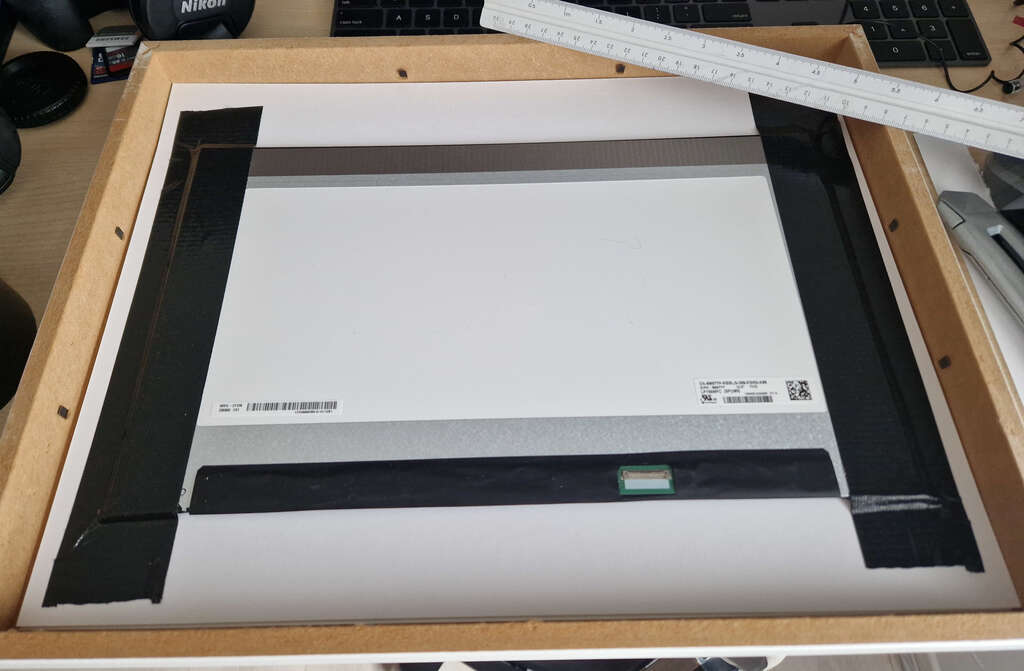
This is an Ikea picture frame, with an LCD screen tapped to the front and a hole in the back for the eDP connector. Everything mounted together:
And the glorious, glorious first boot of the Stonebaked Margherita Homeboard P0:
Of course at this stage the only thing the Houseboard P0 does is boot. An achievement, but not too useful. Next up, I'll make it do something. Possibly crash.
BoM
- Pi Zero (not W, but W works too)
- LCD panel
- HDMI to eDP board
- PoE adapter
- M2 Screws
- Step up board DC-DC 5v to 12V
- M2 Screws
- Jumper wires (get a mix of F/F, M/F and M/M)
- An Ikea Ribba picture frame
- Pizza. Margherita not required.
- Mini HDMI to HDMI
Optionals:
- UART - to figure out why things don't boot, or to debug sensors
- Regulable power source 3 to 30V - useful to debug power to elements in isolation
- HLK-LD2410S 24G mmWave sensor Manual - not used yet, but soon
Useful references
Houseboard P0: HDMI to eDP
Post by Nico Brailovsky @ 2024-07-07 | Permalink | Leave a comment
Minor victory in my quest to build a houseboard based on a Linux-PoE-netboot-RaspberryPi-etc: I figured out how to run my own LCD panel.
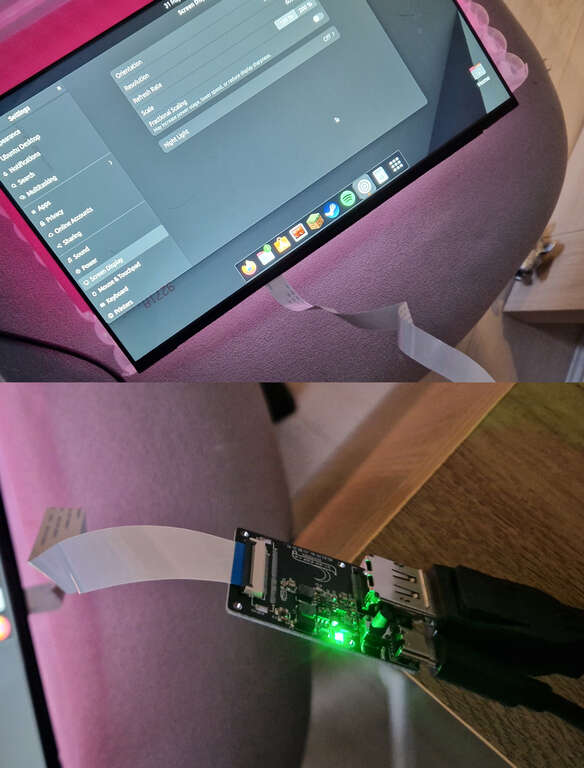
The first step was verifying my panel worked. For this, I used a display port to eDP converter. Turns out eDP is basically DP, but over a ribbon cable. There are some cheap boards, for example, that do this - searching for "DP to eDP" or "display port to eDP" will yield a high number of vendors. The key part is matching the ribbon type of the panel you need to drive (30 or 40 pins).
Unfortunatelly, single-board-computers (like the RaspberryPi) don't have DP, despite DP being better than HDMI in every way. The cost of adding a DP connector seems to be high and mosty in licenses, not necessarily in components, so SBCs don't do it. This meant that getting my expensive GPU to use my cheap panel wasn't good for much beyond knowing the panel works.
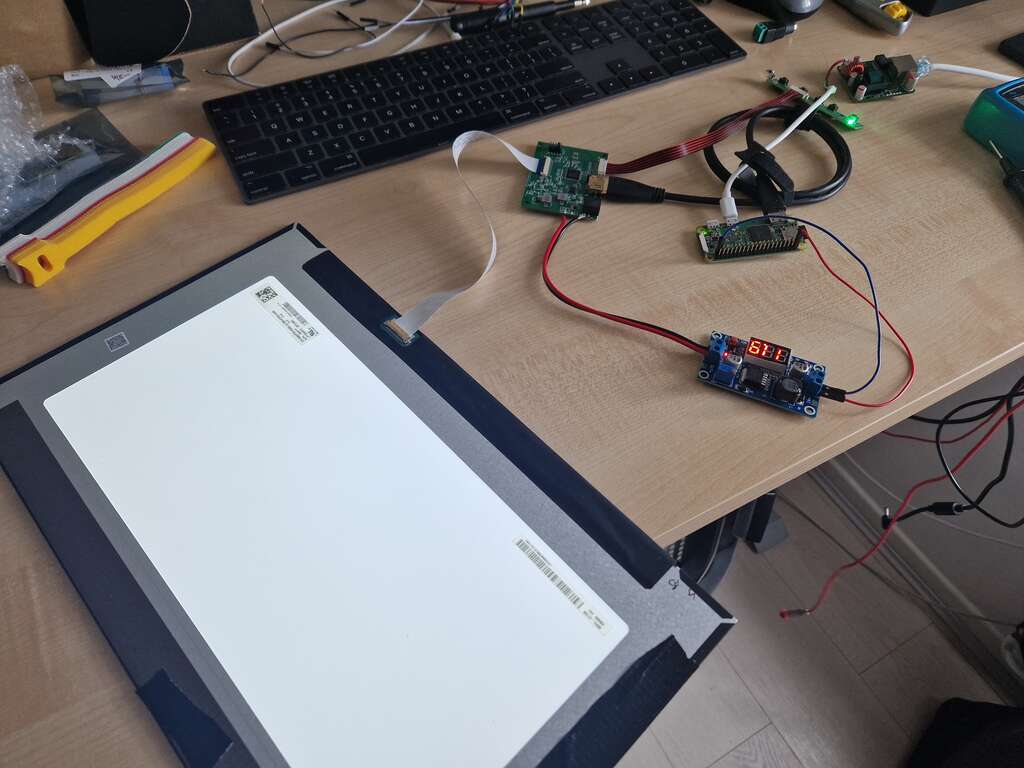
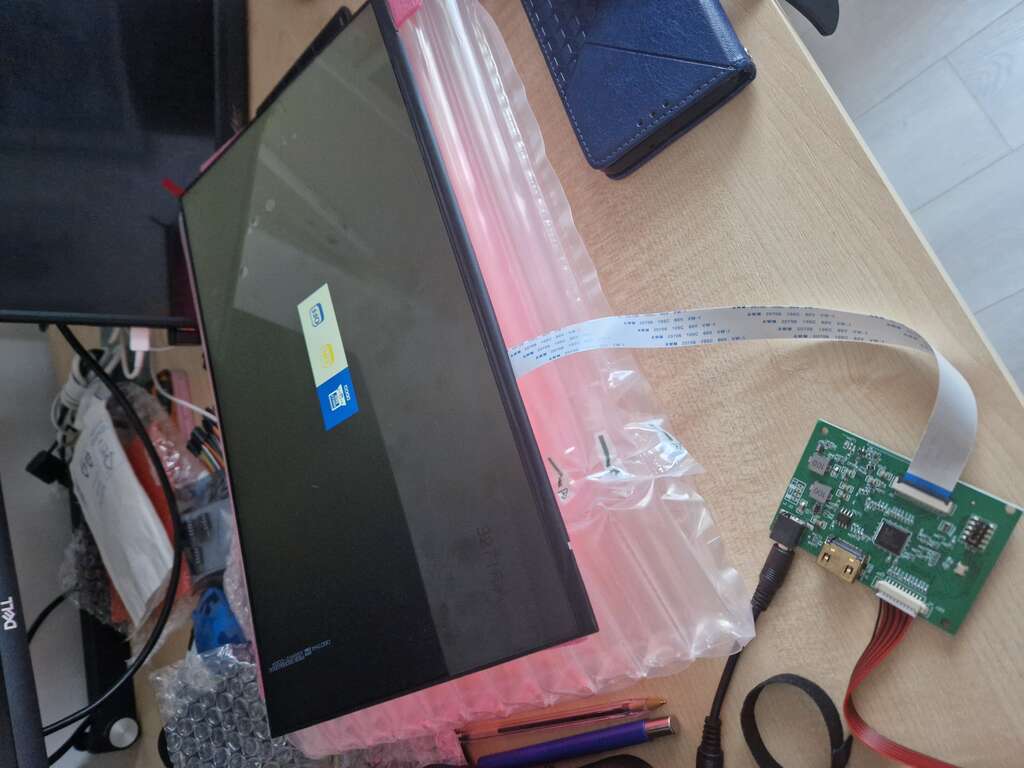
Fortunatelly, I managed to find a board that liked my panel:
I got a "PCB-800807V6-1HDMI-EDP 30PIN LCD driver board", which comes at about £10 and supports multiple resolutions. This was a nice lucky find, and it unblocked the build of HouseboardP0, which I'll document in some other entry.
